

Like these guys, RAWWR!!
However, with our two dining table acquisitions off of Craiglist Micheal and I have run across a pattern (really lots of patterns) of layering new fabric over old fabric, time after time after time...

One layer might not be a huge deal, especially if the first layer is in good condition - but when we cut back the tiger print on this chair, the fabric underneath was disgusting. I had to put on a mask and gloves because of the dust and smell.
But what if that dirty first layer was covered with another 6 layers on top of that? Some of them vinyl so it seals in all of the dust, dirt and nastiness?

This really just isn't healthy, especially with a husband that has severe allergies. These chairs were built in Italy in the 50s, so the earlier layers could have up to 50 years and two countries worth of dust, dirt, food, and grime. So I'm going to show you how to replace the entire seat, cushion and all. It's just a little more work for a lot more peace of mind.
What you will need:
Screwdriver
Needle Nose Pliers
Staple Gun
Marker
Fabric Shears
1/4 - 1/2 Inch Foam
Thin Quilt Batting
Fabric
Step 1:
Turn your chair upside down and remove the screws that are holding the seat to the chair. Save your screws!
Step 2:
Turn the seat over, take out your needle nose pliers
This will leave you with a wooden seat that is now the template for the next steps.

Step 3:
Use the wood template to draw an outline on your foam padding.


Step 4:
Put the padding on the chair and trim up the edges. Cut the front at a 45 degree angle.

(Note: the edges do not have to be perfect, the batting will even it out.)
Step 5:
Use your seat template to cut out a sheet of quilt batting and fabric that will cover the padding and the seat.

You can cut big and trim down later if needed.
Step 6:
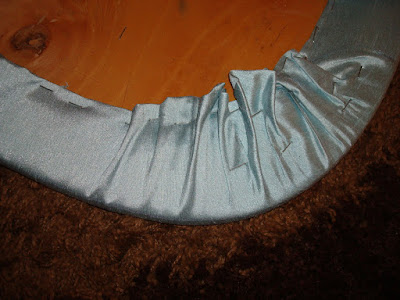
As you staple you want to stretch your batting enough that it's tight, but not too much so it tears. When stapling the batting (and the fabric) start in the center of each side.

Then do each corner. Always mirror your staples across to the other side. Fold the batting in to try and get the flattest finish possible.

Repeat Step 6 with your fabric, taking the extra step to fold the raw edge over before stapling.


Spray each seat with scotch guard and VOILA! Reattach to the chair with your saved screws and you have a refreshed and updated dining set!

PS - You're not going crazy, the first chair is not the same as the final project. I did a compilation of two chairs to get the full effect and to have a picture of each step! :)
2 comments:
This is a great how to! I have never been brave enough to try this. :)
Thanks Heather! I will admit I would have just covered the old fabric had my husband not insisted on redoing the whole thing. After I saw the layers of yuck I was totally a convert! The extra work is totally worth it!
Post a Comment