
$31.48?? For a piece of stained
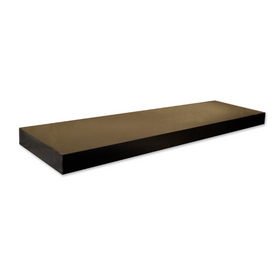
Or you could pay close to $199 per shelf if you are fancy and shop at Pottery Barn:

I think I might still make this shelf, just to prove how easy and inexpensive it is...
When googling "how to make your own floating shelf" there were a few options: 1. Using a hollow core door, 2. Building a box shelf with pine - but nothing really about slapping a big piece of wood up on the wall. No directions huh? It's okay, we were up for the challenge! Who reads the directions anyway?
Oh...you do? Okay then, here are the directions to make your own fabulous floating shelf out of solid wood (no particle board around here!).

What you will need:
1. A piece of wood the sized to what you want (we used "vintage" white oak found at our local surplus store, $7 for a 7 foot piece!)
2. A circular saw or table saw
3. Power hand sander with 100 grit sand paper (or you can use regular old sand paper and some elbow grease.)
4. Stain or paint - we used Minwax's Stain and Poly all in one
5. Blind Shelf Supports
6. Power Drill
7. Chisel
8. Foam Brush
9. Sheetrock Anchor Screws
10. 7/16 and 1/4 inch drill bits
11. Dremel with metal cutting wheel
Step 1: Decide what width and depth you want your shelves. Ours are 39 inches wide/long and 5 inches deep. Make your cuts.

Step 2: Sand your shelves until smooth, we chose to round the corners a little instead of having sharp edges.

Step 3. Stain or paint.

Now it's time to leave the workshop and head up to where you'll be hanging the shelves!
Step 4. Determine where you want to hang the shelves and find the stud for at least one of your anchors. (We used the "knock" method, hollow echo = no stud, solid no echo = stud.) Studs are generally 16" apart so you can also get a good estimate of where to start by measuring 16" from the corner.
Step 5. Measure and mark where the stud would be on your shelf and then make another mark so the brackets will be evenly spaced.
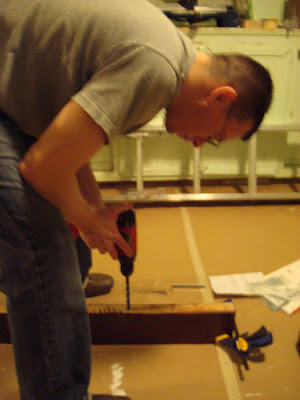
Step 6. Drill the holes where your brackets will go. A tip to make sure you don't go through the front of your shelves: Hold the drill bit next to the shelf and put a small piece of tape on the bit where you should stop drilling.

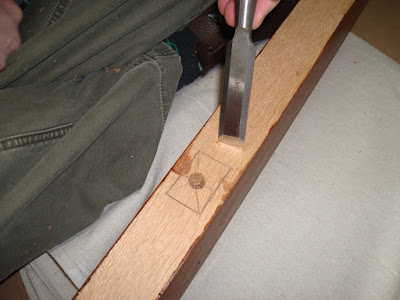
Step 7. Now we have to chisel out a notch in the back so the shelf will sit flat against the wall.

Step 7: Measure the shelf brackets in the holes to see if they need to be shortened. Ours were about 1 inch too long so we used the Dremel (my favorite new tool) to cut off the edge of the bracket.

Step 9: Hang the shelf brackets on the wall and slide the shelves into place.

They're not fully decorated yet (obviously) so I'll post that when I'm done.
Costs:
Wood: $7
Brackets: $30
Stain: "Free" leftover from my dresser
7/16 Drill Bit: $8 (but we'll use it again...)
Drywall Screws: $3
Total: $48 for two solid wood shelves that match the wood in our bedroom. It was a little more than I wanted to spend - I'm still going to try and figure out a cheaper way to recreate the brackets. But all in all I'm very happy with them!
3 comments:
How crafty are you guys! Looks great.
even I never thought would be so easy to make floating shelves :)
Cheaper way for brackets? Maybe just use 8 inch lag screws directly into studs,& then cut the heads off. About $1, & you can skip the chiseling step.
Post a Comment