Monday, February 18, 2013

Gerald Thurston's Swing-Arm Light

I know you were wondering why I posted a history lesson on Thurston's lamps. The answer is simple, we recently restored a Thurston lamp we bought at an estate sale late last year. We had no idea of the lamp's lineage when we bought it, we just really liked the design and we were able to negotiate the price down citing the significant crack in the swingarm, slight damage to the shade, and the veneer accents separating from the shade. It has taken some trial-and-error but it's finished and we're ecstatic with the final result. 


I started with cleaning the shade and fixing the walnut veneer accents. Several of the accents had separated from the shade, to reattach them I applied a small amount of Gorilla Glue to a toothpick which I then ran down the length of the accents. With the accents settled I was able to "pop-out" the small damaged section on the shade by pushing the damaged section out from the inside of the shade using a tennis ball. The reason for the tennis ball is it dispersed the damage section evenly so I could push it through so when I pulled the ball back the damaged section fit back together (best analogy would be resetting a broken bone). I then removed the numerous white paint specks and applied a little teak oil to the veneer. I let the oil soak in before wiping the shade down with paste wax. 


The left side shows the "before"...
...and "after"
I repaired the long crack in the walnut swingarm using Gorilla Glue and clamps. I let it set for a few days before sanding it down and staining with Minwax Walnut stain. I then finished the arm with a couple coats of Tung oil. The brass tube in the swingarm and the shade cap look amazing after cleaning them with Brasso (I'll post a couple close up pics this weekend). The brass tube can retract or extend to adjust how far the lamp projects into the room, there is a red section marked on the tube warn you not to over-extend the lamp. 


Before
After
Rewiring the light was a slightly aggravating process. To begin we heated the old soldered connections to the porcelain sockets so we could easily remove the old wiring. 


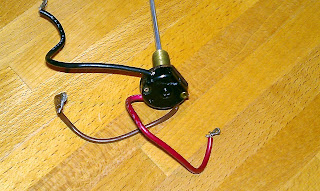
Kari deciphered the wiring, but in the process the 2-circuit rotary switch was broken and one of the soldered connections in the switch broke off as well. I was able to solder the wire to its strike plate and reinsert in the rotary switch. Then I super glued the switch back together. Kari finished the wiring, we soldered new connections, and then reassembled the lamp.


We opted for a new brown cloth covered cord and a new plug-in. Once everything was assembled we ran the cord through the original weight so we can adjust the height of the lamp and wired the plug. Then we measured out the perfect place on the living room wall. 


3 comments:

Nutbird said...

You have way more patience than I have. Great job!

Candace said...

I just LOVE it, when you can sit down and look at a really well finished project! Your patience amazes me. Is it all wood or wood and glass?

KLS said...

Thanks! The little veneer cutouts are wood and the other part is fiberglass.