Saturday, October 16, 2010

WEGMANS!!

Is coming to a town NEAR ME! If you live near me it's coming to a town near you as well. I love love love this grocery store. A Wegmans was built in Fredericksburg about 3 months before we moved away and I was so sad to leave it.

So imagine my excitement and surprise to get this in the mail!


The part that's covered up says that it opens October 24th!

Grocery shopping next weekend! Seriously, if there is one near you and you haven't checked it out go do it. NOW.

Friday, October 15, 2010

Target Finds

I'm sure like many of you Target seems to be the enemy of every pocket book in America. But they have such COOL stuff! I'm loving these two rugs right now, the black/white contrast and patterns would go great with our mid century decor. Good thing Christmas is coming up! :)


Room Essentials Starburst Accent Rug


Room Essentials Bright Rung

Thursday, October 14, 2010

I said we were busy last weekend right?

Well I wasn't lying! And since this weekend is creeping up on us I decided to lump the rest into one post. :) Mega-productivity post!! (And avoiding my dissertation post...)

1. Put in the new cabinet Micheal built to fit the old refrigerator hole. This will give me 34" of additional counter space and was build specifically to house my amazing Green Apple Kitchenaid Mixer.

Before


Middle


After


2. Built our own roll out cabinet shelf

The cabinet under the wall oven is one of those deep buggers where you stick long lost small appliances and then curse when you want to get out the mini-chopper and you have to unload the hand mixer, the crock pot, AND the rice cooker to get it. Also you look glamorous laying on your side reaching all the way to the back hoping there are no vicious dust bunnies.

We visited The Container Store and drooled over cabinet systems like these:

But $60?! For a drawer??


So we used one $13 set of drawer pulls and about $8 worth of wood to create our own. Yay DIY!


We put in 2x4 on the side to attach the drawer pulls.


One on each side - we went for the fancier "ball-bearing" slides. If you wanted to be even MORE frugal you can go for the $6 drawer slides.


To build the drawer we measured and cut a piece of plywood panel with our handy dandy finishing saw and cut four pieces of 1x4 for the sides. Next wood glue and nail gun!


3. Install above microwave cabinet, microwave, and signed our work. :)

This process was intimidating...we purchased our amazing Kenmore Elite microwave from Sears Scratch and Dent so it did not come with destructions (as my dad would say.) So we downloaded what we could and used the holes and screws available to try and figure out to hang this mammoth piece of cooking equipment.


Micheal build this upper cabinet that would attach to the top of the microwave and we hung the metal backing that the microwave slides onto.


Then we put on the F2F signature and left a note for any future homeowners who might remodel our kitchen in the future.


It was a very tense 10 minutes when we were holding and screwing this guy in but it was SO worth it. I love it...


And there you have it! Big plans for the weekend too! It's so close I can smell the cookies, can you?!

Wednesday, October 13, 2010

What I learned today... (and recessed lights!)

What I learned today was that no one cares about all the stuff I write unless I include pictures. SHEESH! ;) So here are some pictures of one of MANY productive things we did this weekend!

We installed recessed lights to replace the large commercial ceiling light in our kitchen!!


See it there at the top? No not the hideous pink one (although it's gone too) the big white square. Yeah, it's pretty bad - functional - but not our style.


First step - TURN OFF POWER! Then remove old light and take a picture of how it's wired.


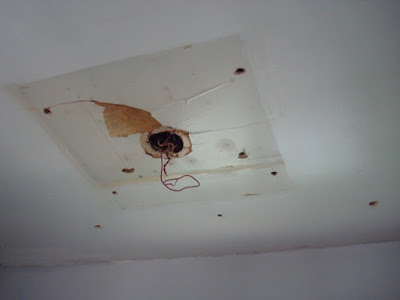
Second step - we went into the attic and turned the junction box into the attic since the light placement would be changing. Then patch the hole!

We went through a few options trying to decide which lights to choose.

We looked at these small 3" lights at Home Depot:
and settled on a similar version but with florescent bulbs instead.

After selecting the lights we needed to decide what was the best layout for our room. We need lighting in two major areas: Above the sink/cooking area and in the breakfast nook area. So we elected to put up the lights in groups of threes.

Next we measured out where to plan to place our lights:


Then we held the light up over the marks and traced the footprint of the light so we could cut the holes using a drywall knife.


At this point Micheal realized when we measured we had not taken into account ceiling joists (oops!) - fortunately for us we didn't hit any with our holes, but next time we would check this out first. :)

These lights were SUPER easy to install. (Unless you fall off the ladder, scrape your leg on the counter and only evade death because your husband was there to catch you...) They just push up in the ceiling and clip onto the sheetrock.


After this I did the wiring...in theory the wiring for recessed lights is very simple. One light ties directly to your switch and the lights connect to each other in a line. But of course with our house nothing is easy. It took me two hours on my side in the attic, some bruised ribs, and a lot of curse words to get this done but...

Let there be light!!

Monday, October 11, 2010

Weekend Update & WWL 10/11/10

It was a busy weekend in the F2F house! We got a ton accomplished and they are nice visible changes so it's starting to feel good - it's starting to really come together!!

  1. Finish door and windows
    • Metal trim
    • Mud
    • Sand (some final sanding left to do unfortunately)
  2. Walls
    • Finish priming gray
    • Paint orange - WOO!! One small wall left to do.
  3. Cabinets
    • Paint - doing some finishing touchups
    • Buy and install handles
    • Buy and install hinges
    • Put new bottom in under sink cabinet
    • Install side panel beside dishwasher
    • Put in cork shelf liner - we're doing it as we go
  4. Electrical
    • Replace all old outlets and switches
    • Turn this junction box into the attic and patch ceiling
    • Maybe replace ugly light
    • Move outlet for microwave
    • Install microwave
    - it's BEAUTIFUL!
  5. Trim
    • Finish sanding window trim - Gave up and took it down, it was messed up.
    • Prime and paint window trim
    • Finish sanding pantry trim
    • Prime and paint pantry trim
    • Sand floor trim
    • Paint floor trim
  6. Ceiling
    • Sand
    • Remove hooks
    • Paint
    • Sand and paint patches
  7. Counters
    • Remove old counters
    • Cut new counters
    • Install new counters
  8. Backsplash
    • Decide on and purchase backsplash tiles
    • Remove old vent and patch hole
    • Install & grout tiles
  9. Buy and install new sink
  10. Clean grout in floor
  11. New pantry door
We also built a pull-out drawer for the cabinet under the wall oven - we were trying to make this more usable space. How many of you have lost things in the back of these non-accessible cabinets? This drawer is awesome and easy to build!! Directions to come of course :) WWL:
  1. No matter HOW many sizes of screws you have you will always need the one that is 1/4" longer or shorter. Sometimes 1/4 inch can seem like 1/4 mile!
  2. We are now coloring in the lines.
  3. Don't switch paint bases in the middle of a project, even if you color match.
  4. Indi does not have a mute button.
  5. Uncle Julio's swirl margarita is good, but not quite as good as the ones at Lauriol Plaza.
  6. It is amazing how quickly a smell can permeate the house - our new sink is amazing but the rubberized coat was so so so stinky. It's been outside since we got it!

Wednesday, October 6, 2010

Pitfalls of Pets and Renovation

Generally our kitties just run for the hills when we get out the power tools (especially poor Moshe) but occasionally they poke their little noses into the construction zone particularly if it's a day without noisy tools.

So far Kali has stepped in my paint pan, Moshe regularly tried to brush against wet paint or wet joint compound. Indi walks through all the construction dust because she wants to be RIGHT WITH YOU AT ALL TIMES!!

But this was really the best/worst/most hilarious and I had to share a pic.


Poor Moshe...that require a good washing of the paws, of which he was not a big fan. I love that you can almost see the process unfolding - the back right paw hits and slides, the back left paw spreads out to try and get some grip...lots of laughs that day. :)

Monday, October 4, 2010

Weekend Update & WWL 10/4/10

We got to cross a few things off the list this weekend! (And when I say "we" I totally mean Micheal because I was one big germ-wad that held down the couch.)

ALL THREE UPPER CABINETS ARE HUNG!! WOOT! If that's not progress, I don't know what is.


We need to clean up the insides a little but I am choosing not to paint them. I know this is a pet peeve for some people and I might regret it sometime later but I'm willing to take that chance. I want cabinets.NOW.

We're doing cork liner on the bottom of each shelf and I really like the way it looks. I couldn't find ANY contact paper that I liked (that's being nice, it all seems to be hideous) so the cork is kinda pricey but worth it.


What we learned:

1. The Maryland ModSquad is not invincible (sad face...stupid fantasy football)
2. Trips to Home Depot are not nearly as fun with tissues in one hand and Robitussin in the other.
3. Little Japanese Maple trees are 39.99 at Home Depot - I see one in my future along with the demise of two VERY pokey holly trees.
4. It can go from zero to COLD in 3.5 seconds when you have no insulation.
5. Even at the age of 29 (cringe) chicken noodle soup and a grilled cheese sandwich are awesome when you're sick. (And so is your amazing husband who makes them.)

Sunday, October 3, 2010

Sink is ordered!

While Micheal and I were both agreed on the fact that we DEFINITELY wanted to replace our current sink:


It was an inexpensive choice from Community Forklift to replace the sink original to the house. But the smaller basin has proven to be totally non-functional.

Despite our united front to replace said non-functional sink, we were having trouble agreeing on a replacement sink. Despite of how well we get along, design choices have turned out to be our achilles heel for agreeableness. So it has been a learning process about how to come to decisions that make both of us happy.

I wanted a white sink - I thought it would go very well with our color scheme and I felt were a more inexpensive option.


Micheal really liked the granite composites or granite sinks or a higher grade stainless steel sink.

If we had unlimited funds I would get one of the apron front sinks that are so popular right now.


Coming to a compromise has been a bit of a challenge. We almost went up in price to get one we both agreed on (which is our typical MO but is getting a little tough on the pocket book):


Instead we combined his desire or higher grade stainless steel with a bit more of a modern design that I found appealing. So it wasn't the same old standard blah SS sink.


We ordered from Overstock.com and they had free shipping for Oktoberstock month. :) I can't wait until it arrives! It was a great compromise and I think we're both happy with the decision.

Friday, October 1, 2010

Re-Hanging A Cabinet

That's right people, we have cabinets!! And since I'm on the couch suffering the plague given to me by my coworkers I have time to post. :)

There are several things to consider when hanging cabinets - most importantly is how the cabinets are going to be securely attached to the wall. Generally you want to anchor your cabinets into the studs on your wall that are supposed to be space out every 16 inches. However when RE-hanging cabinets your kind of at the mercy of where the cabinets were hung the first time. Studs or no studs.

Additionally in an older homes like ours there aren't studs between the brick and sheetrock, but a very thin "fir strip" every 16 inches. These fir strips don't provide as much support as a stud so we supplemented with super intense screw/anchors.


We measured to make sure they were long enough to go through the cabinet, the sheet rock, and into the brick/mortar to give us the support we needed.

Now to hang them.


First we built up a makeshift stand to hold the cabinet so we could get it level and mark where the holes needed to be drilled.


Once we got it to the height we needed Michel put some nails in the pre-existing holes and gently tapped them to mark on the wall where we needed to drill.


Next we used a long drill bit to pre-drill the hole all the way into the brick. Get a bit that is the same width as your anchors. Ours were 3/16.


Then we put the cabinet back on our cabinet stand and used a power drill to drill the anchors into the wall.

And voila!


And then stick a few things in it to get that warm fuzzy "I just hung a cabinet" feeling.